This repository was archived by the owner on Jul 24, 2020. It is now read-only.
Heroku Deployment Guide
Welcome to the Reservations Heroku deployment guide. Please select which of the following methods you're using to deploy to Heroku: Heroku button or Heroku toolbelt / CLI.
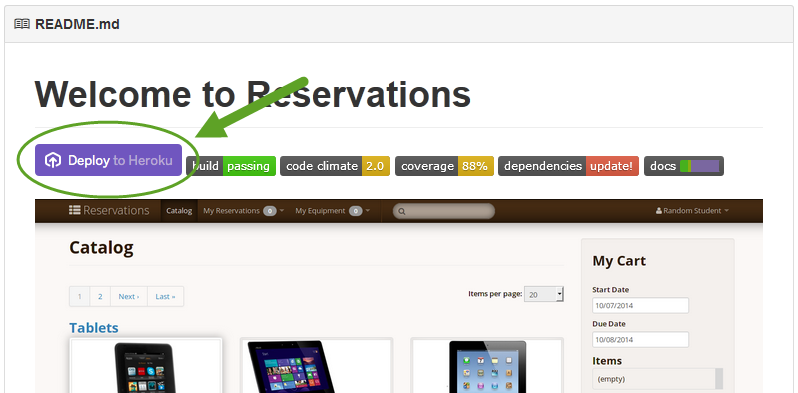
Deploying to Heroku with the Heroku button is quick, easy, and a great way to get an instance of Reservations up and running quickly. The steps for a fully-functioning deployment are as follows:
- Click on the "Deploy to Heroku" button in the README
- Create a Heroku account or sign in to your existing account
- Enter an application name (this must be unique across all users of Heroku)
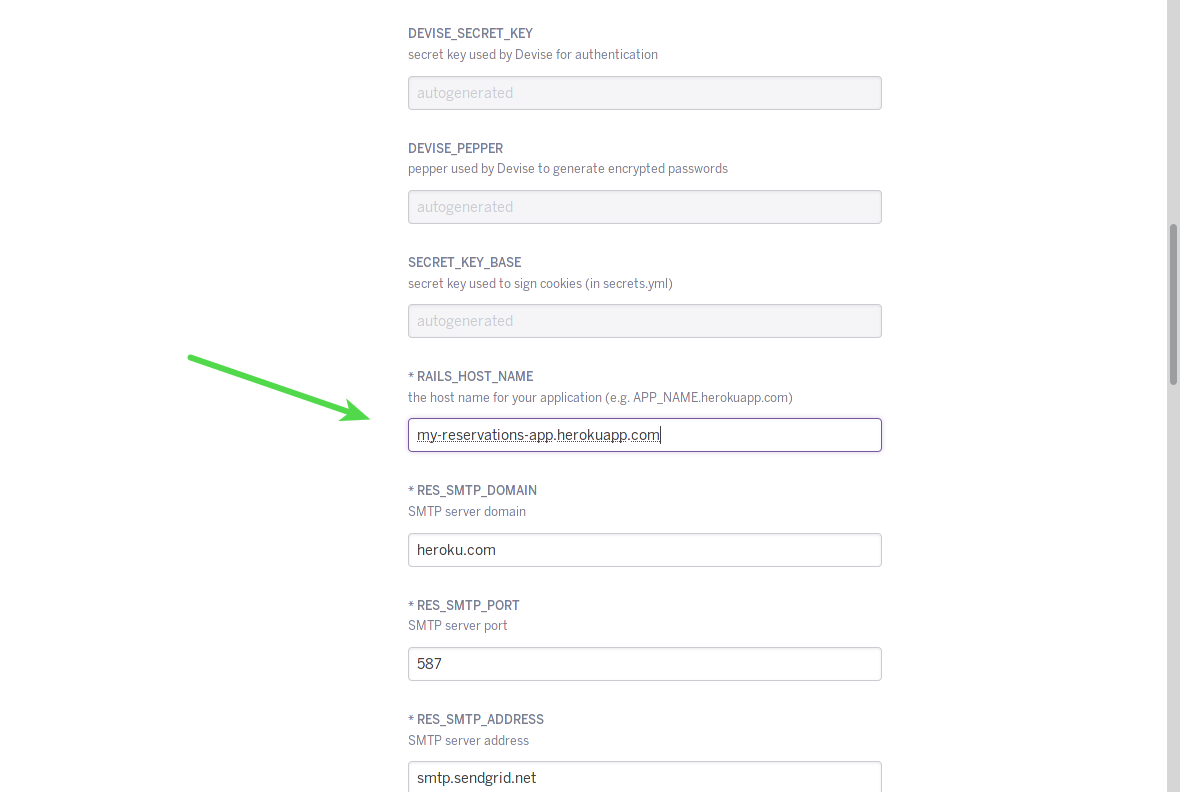
- Enter the instance hostname for the
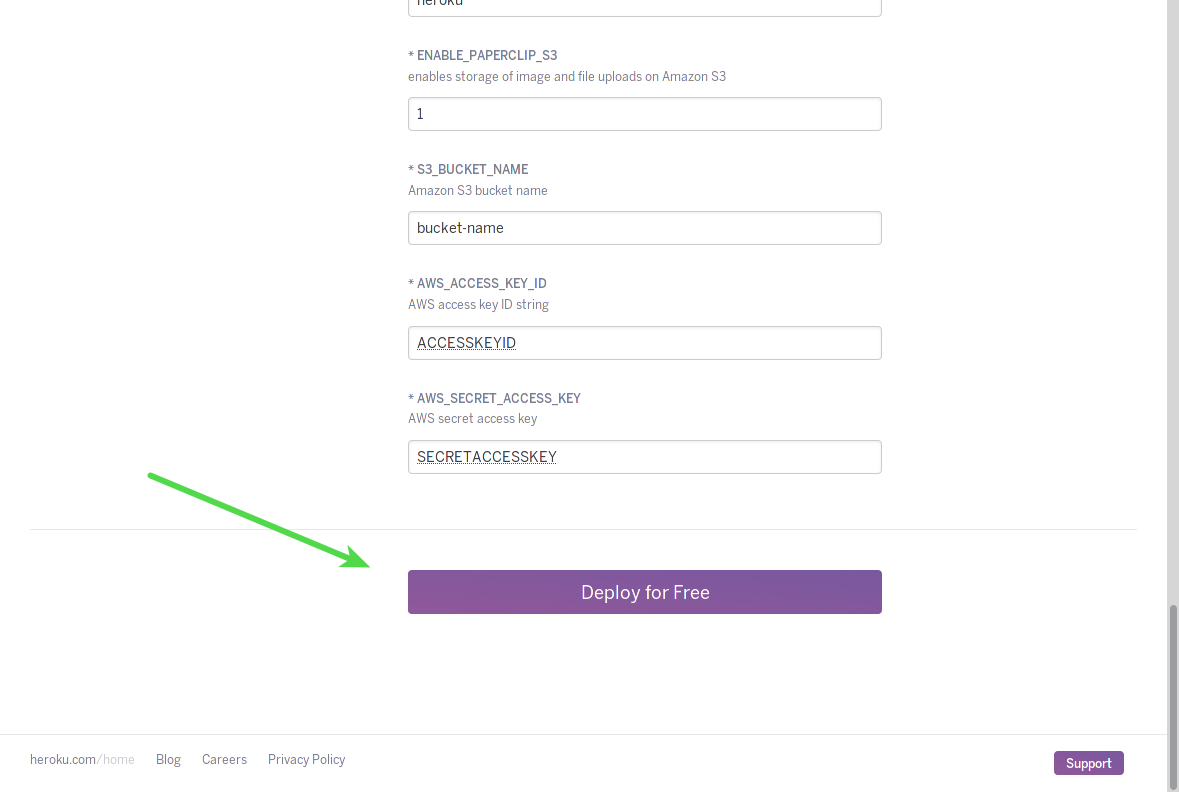
RAILS_HOST_NAMEconfig setting - Click the "Deploy for Free" button

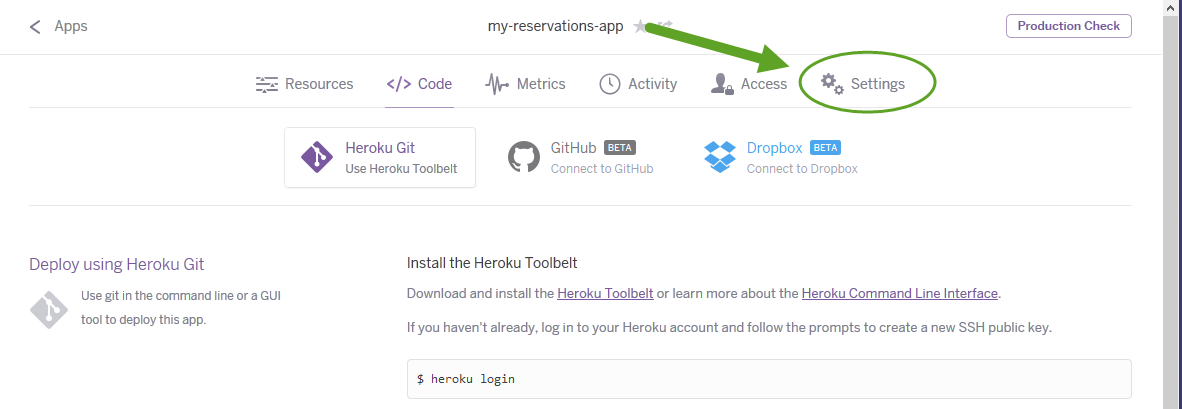
- When deployment is finished, click on the "Make your first edit" link
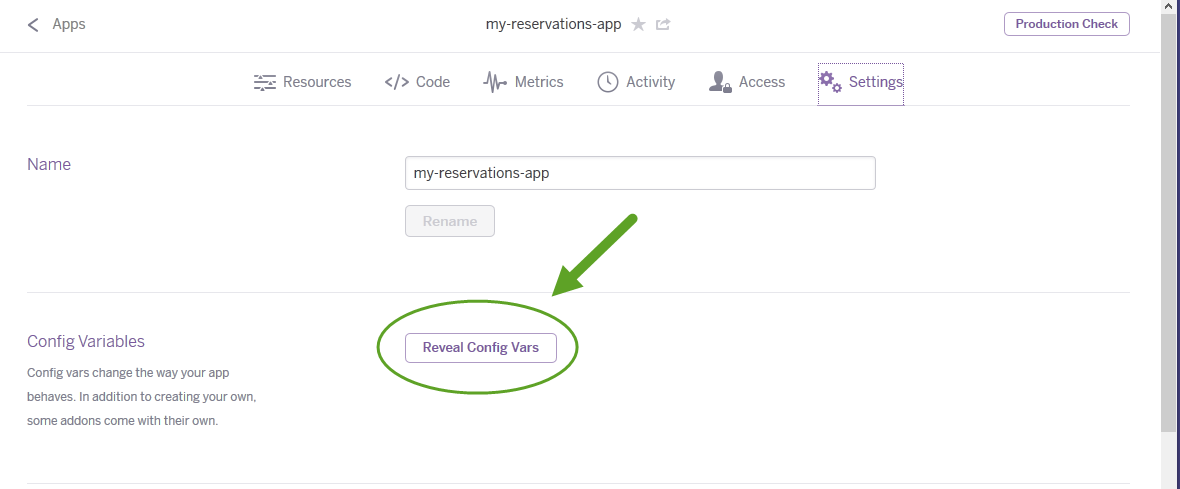
- Click on the "Settings" link
- Click on the "Reveal Config Vars" button
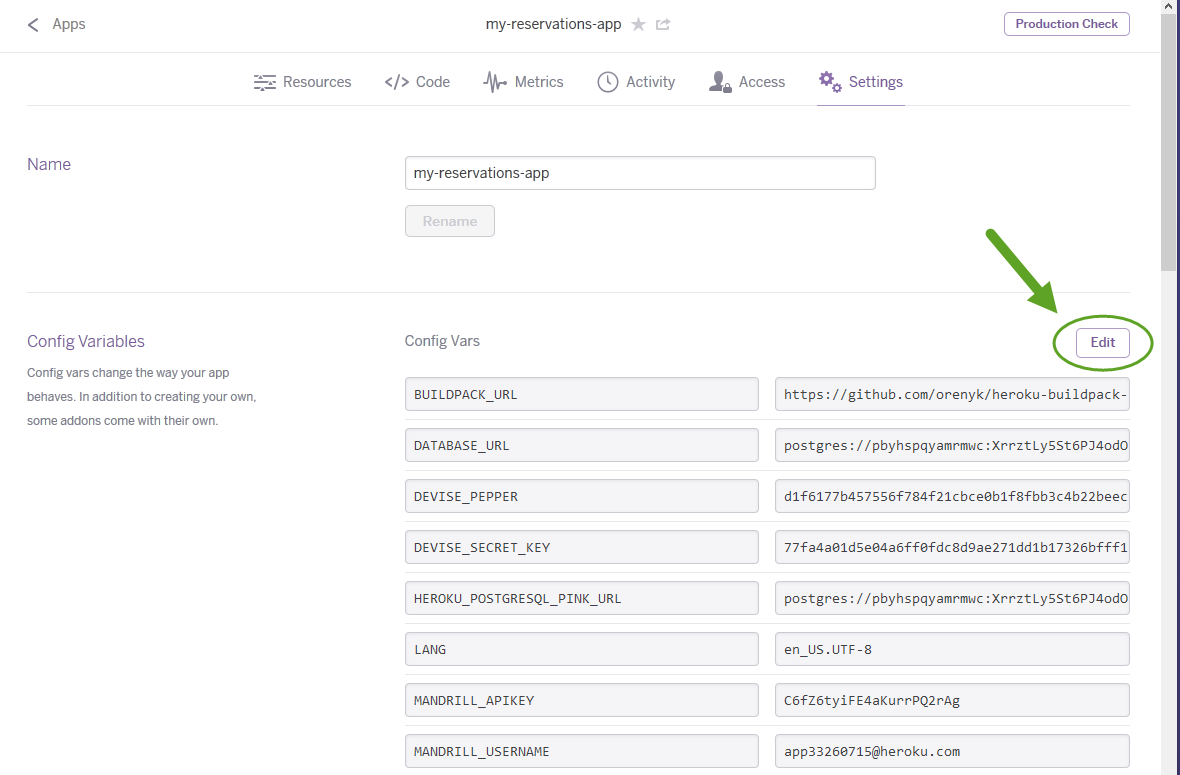
- Click on the "Edit" button
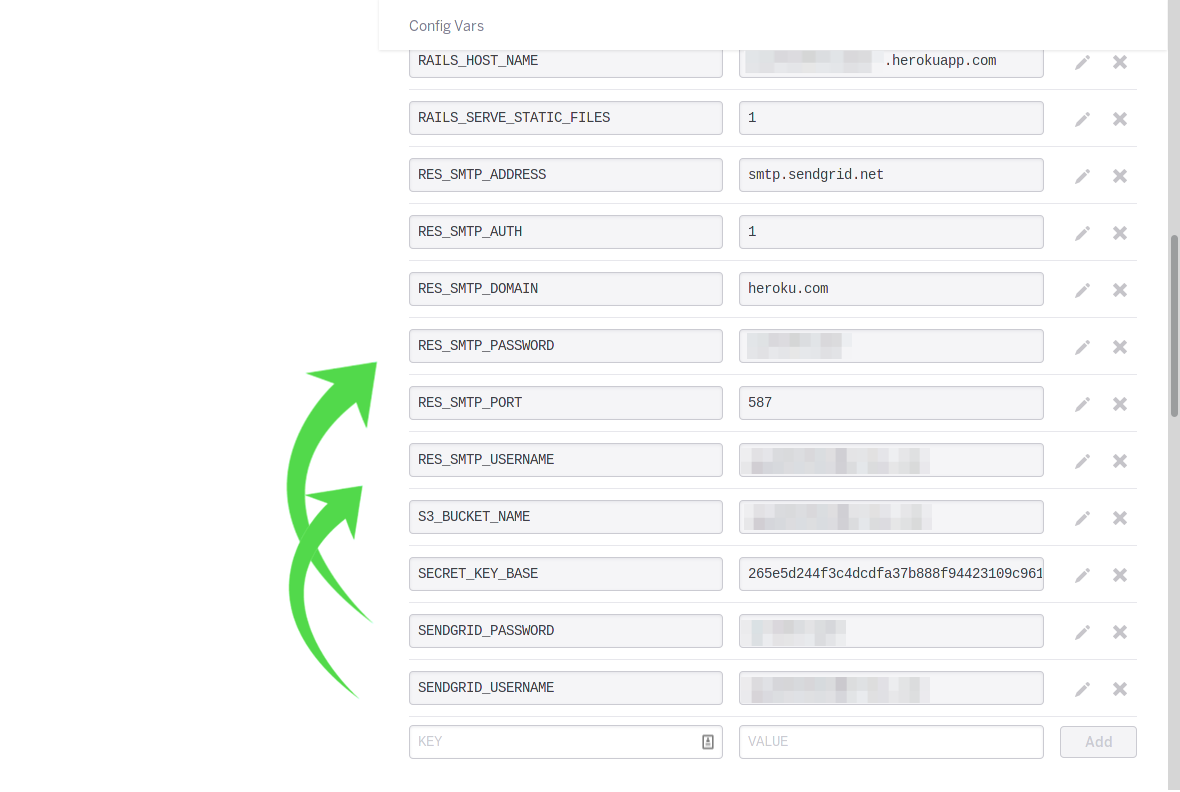
- Copy the
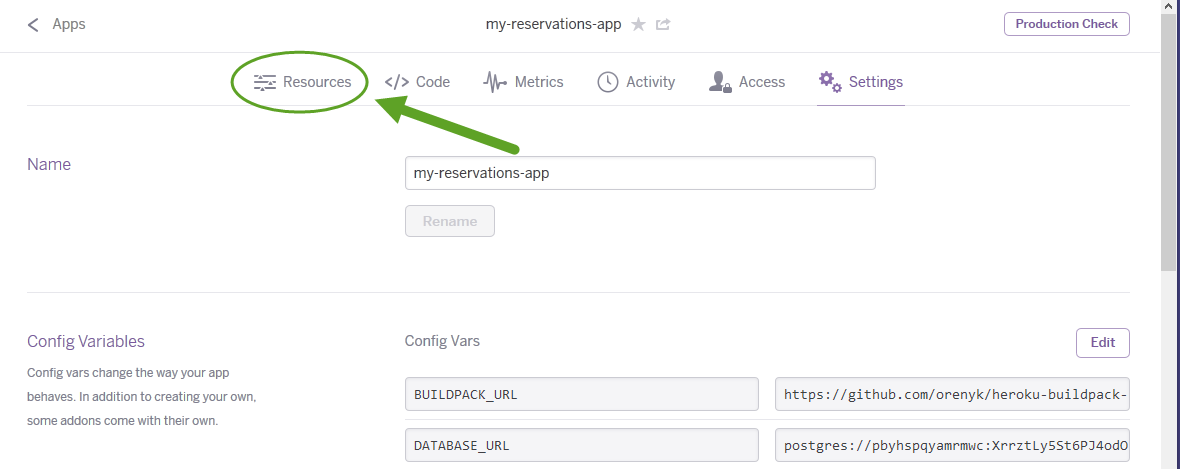
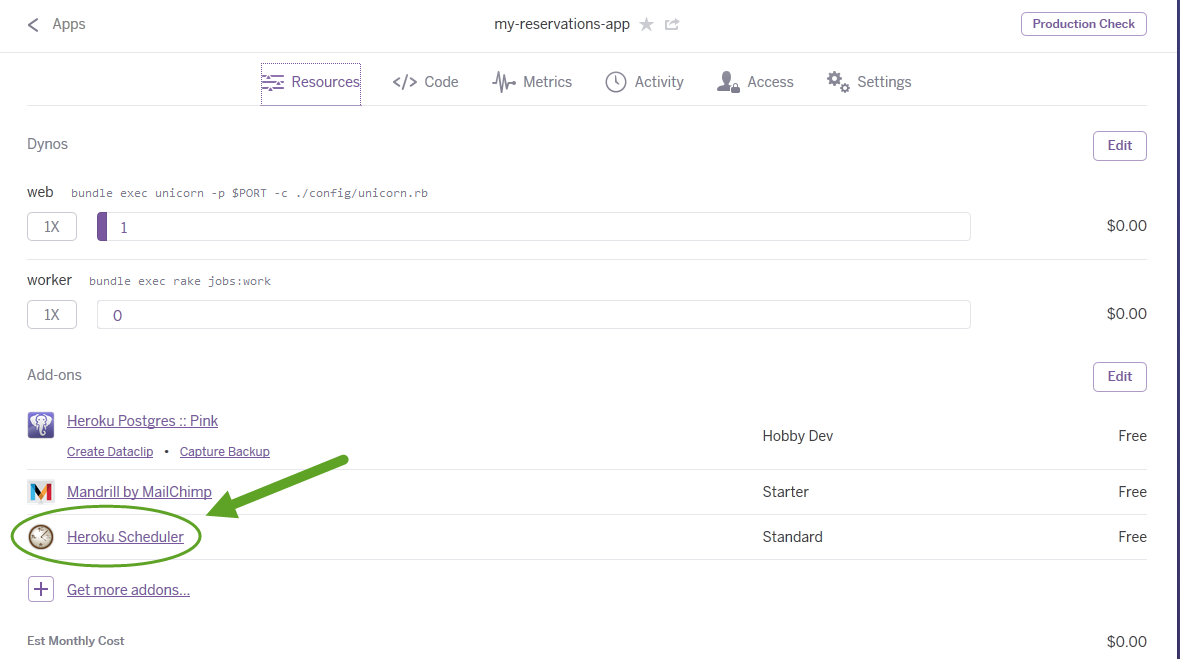
MANDRILL_APIKEYvar into theRES_SMTP_PASSWORDvar and theMANDRILL_USERNAMEvar into theRES_SMTP_USERNAMEvar and click the "Save" button - Click on the "Resources" link
- Click on the "Scheduler" add-on link
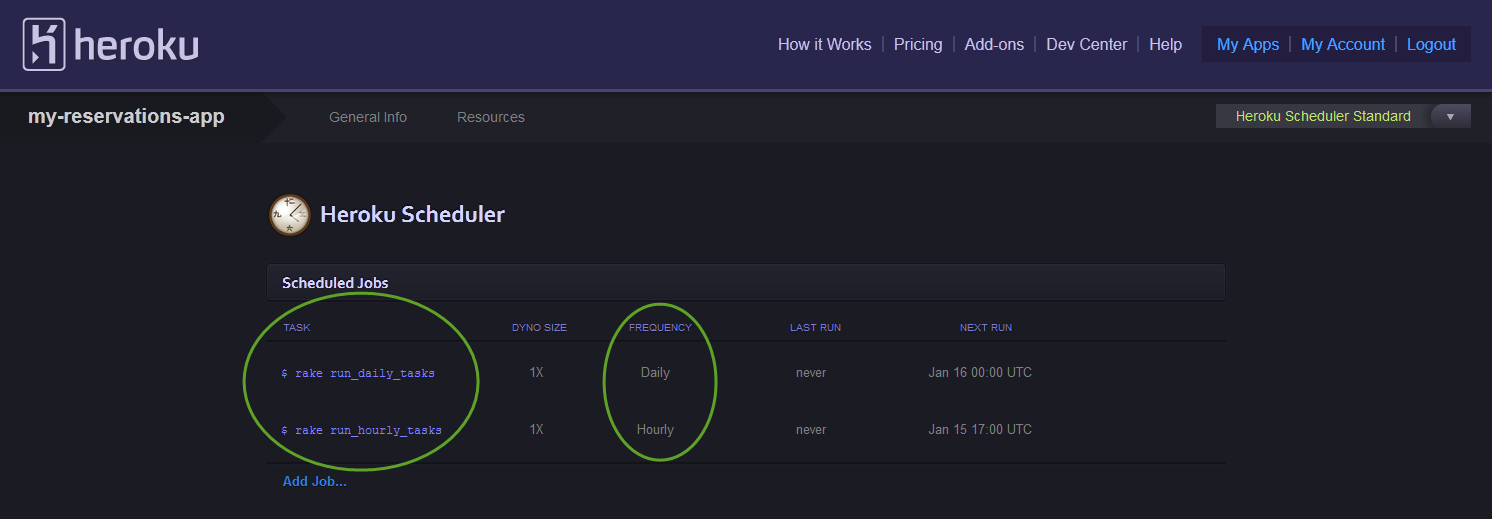
- Schedule hourly (
rake run_hourly_tasks) and daily (rake run_daily_tasks) rake tasks

- Note that these jobs will consume Heroku resources and can result in your application costing you money. For more information see here.
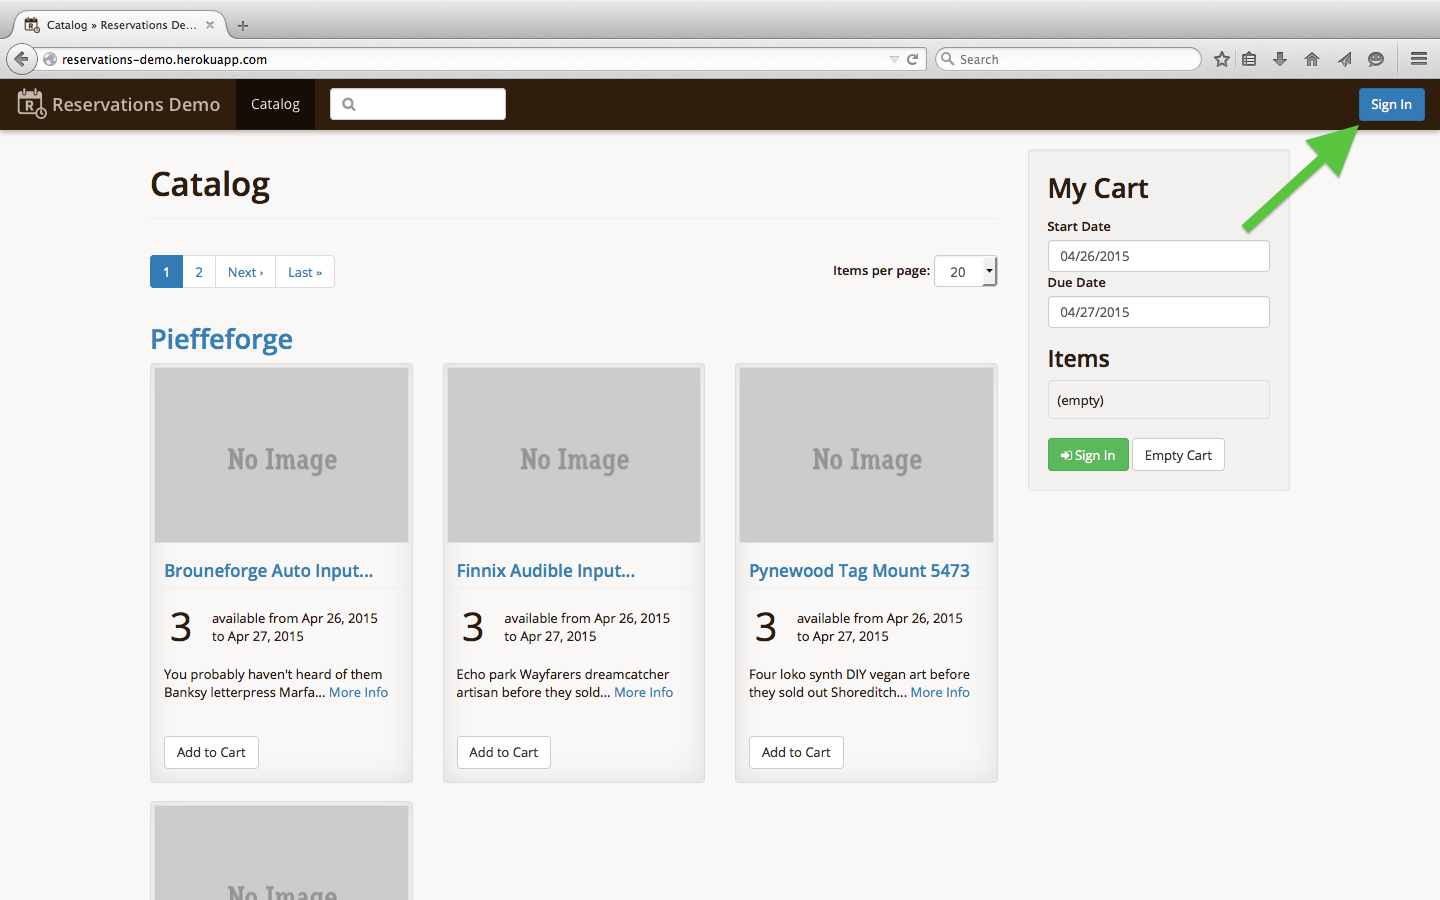
- Visit your instance (
http://my-reservations-app.herokuapp.com) - Click on the "Sign In" link on the top-right corner
- Log in with the email
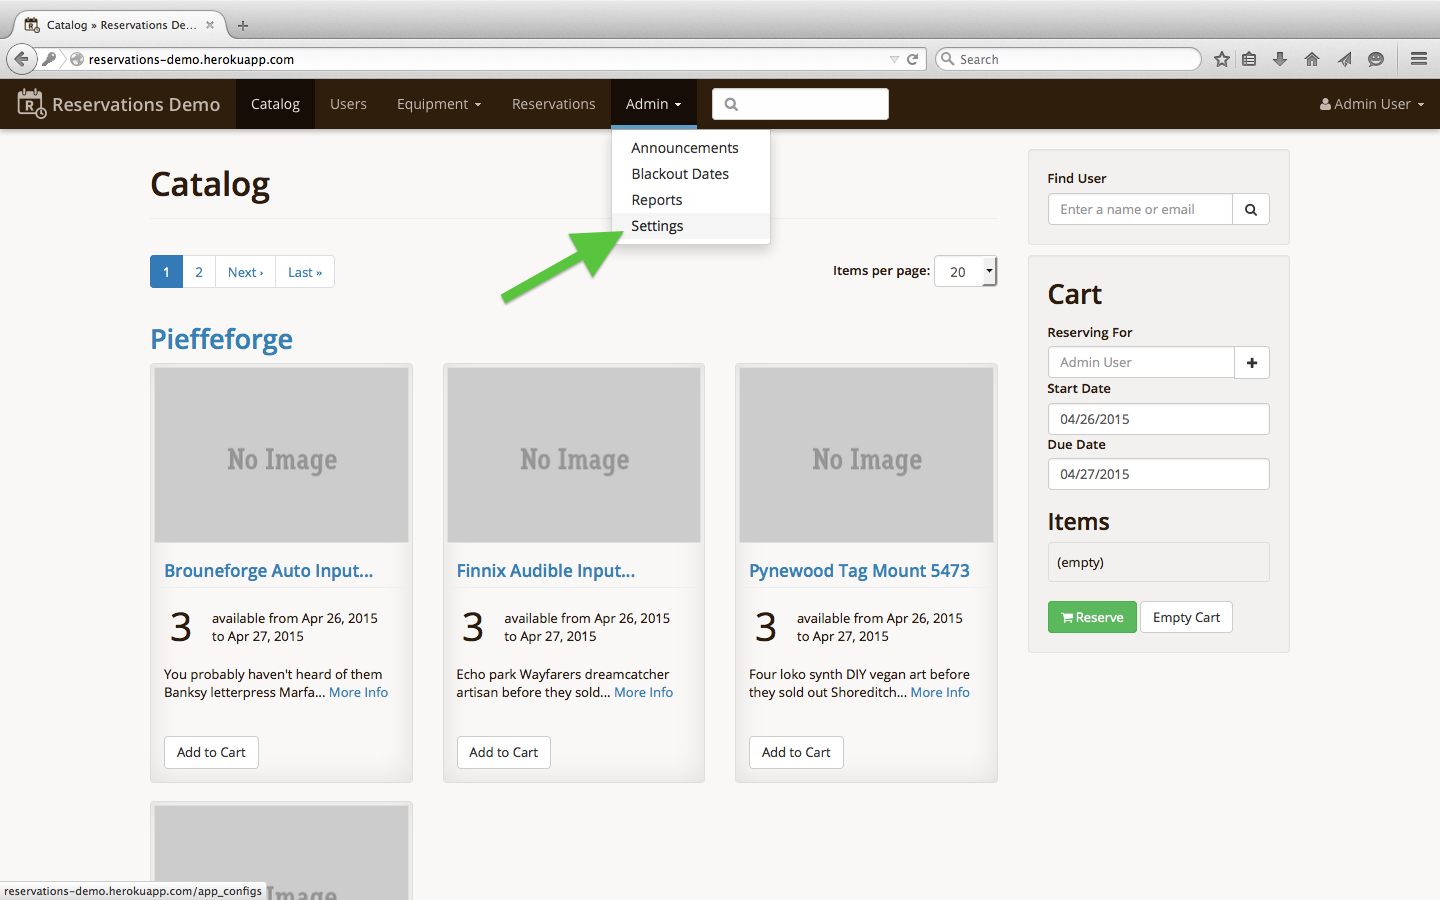
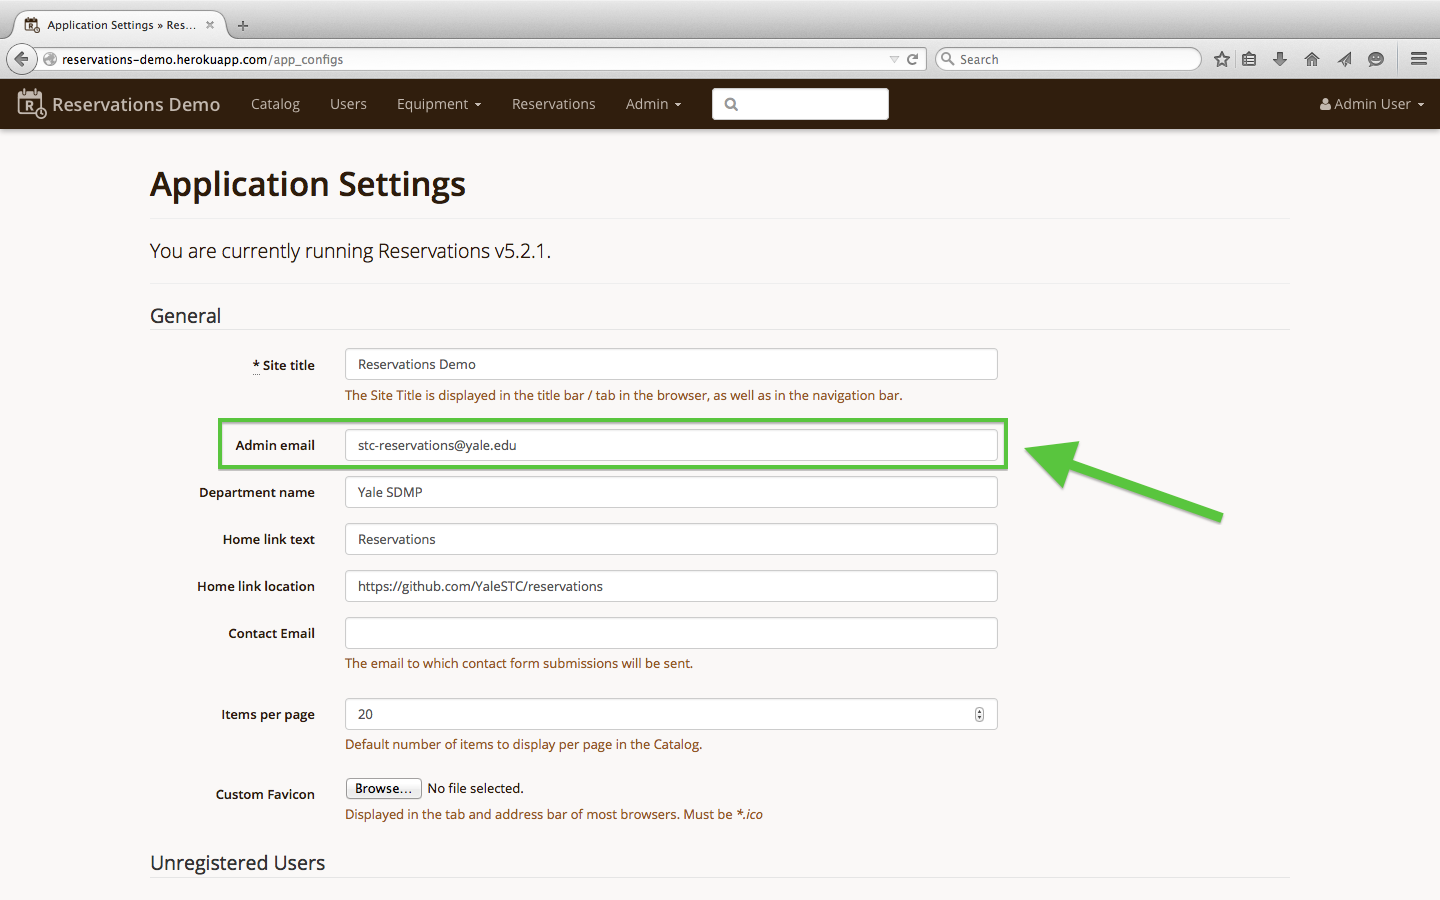
[email protected]and passwordpassw0rd - Visit the application settings
- Edit the settings to your liking and click on the "Update Settings" button on the bottom of the page; make sure to change the "Admin email" setting to your e-mail address so you receive notifications [screenshot - edit_admin_email.png]
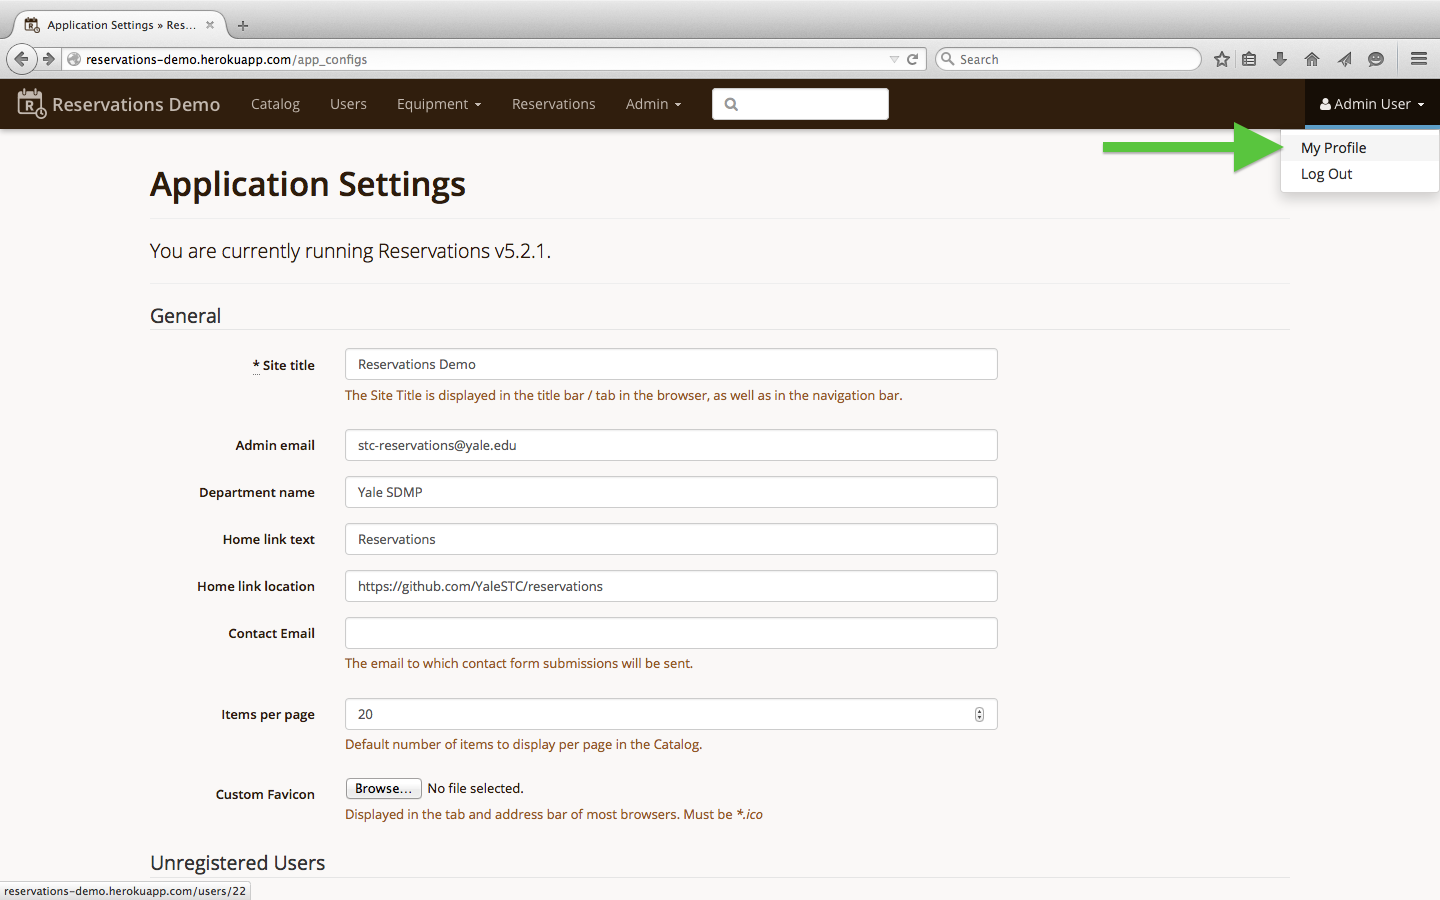
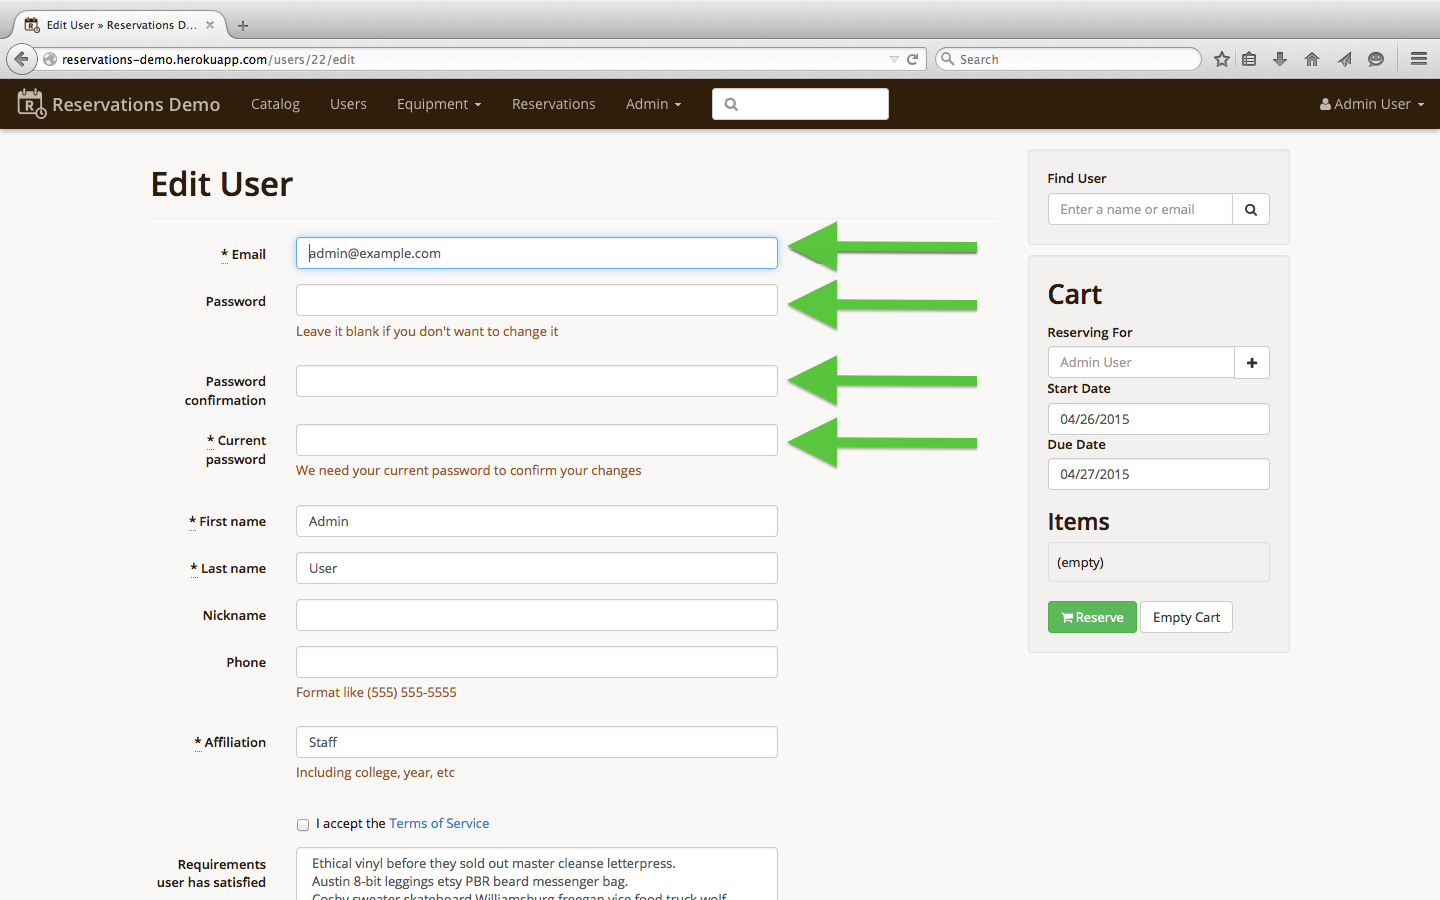
- Visit your user profile
- Click on the "Edit Information" button on the bottom of the page and edit your profile as desired; make sure to change your "Email" and "Password" at a minimum
Include two sections, one for Heroku button deployment and one for generalized deployment (e.g. using rake app:setup and manual configuration of the application, see this comment).
Instructions go here:
- Click on "Deploy to Heroku" button
- Instructions in Heroku form (w/ screenshots)
- set up app name
- properly enter
RAILS_HOST_NAME - Post-deployment instructions (screenshots)
- set up e-mail authentication configs
- change the superuser login info / profile
- change the app configs (particularly e-mail)
- schedule cron jobs if desired